This short guide gives clear, practical steps to clean preinstalled apps and free up space on your PC. You’ll learn safe ways to identify which programs slow your system and which ones are essential.
We cover simple fixes in the Start menu and Settings, then move to advanced options like Group Policy, PowerShell, and trusted scripts. Win11Debloat is highlighted as a lightweight PowerShell script that can disable telemetry, remove ad components, and tidy Start and taskbar elements.
You’ll also get friendly tips to create a restore point, back up files, and use an allowlist so core tools keep working. The article shows how to test results by checking the app list, measuring boot time, and spotting background processes.
Follow these steps to make a plan, apply quick wins, and use deeper techniques for a cleaner, faster setup that’s easy to revert if needed.
Key Takeaways
- Start with Settings and the Start menu for quick gains.
- Create a restore point before making changes.
- Use a vetted script like Win11Debloat for automation.
- Keep essential apps on an allowlist to avoid breaking features.
- Measure results by checking boot time and background processes.
What bloatware is and why it slows Windows
Preinstalled software often hides in plain sight, quietly using resources and slowing your PC. Bloatware generally means extra apps that add little value but consume CPU, RAM, and disk space.
Common types: adware, toolbars, trialware, and utility apps
Typical examples include adware that injects pop-ups, browser toolbars that clutter navigation, and trialware that nags for subscriptions. Third‑party utility apps can duplicate features already built in.
How bloatware impacts performance, storage space, and privacy
These programs often run background services and scheduled tasks. That reduces startup speed and makes the system less responsive.
They also occupy storage space and pile up Start entries. Some change browser defaults or install trackers, which raises privacy concerns on shared devices.
What counts as unnecessary varies by user and device. Research unfamiliar applications before acting, so you don’t remove a helpful vendor tool or driver companion.
Before you begin: safety, backups, and how to identify bloatware
Start with a safety plan. Back up user files and create a system restore point so you can undo changes if a program removal breaks dependent features.
Next, build a clear list of installed apps. Open Settings > Apps > Add or Remove Programs and export or copy a working list. This list helps you track what you change and verify results.
Scan the Start menu too. Many pinned items are quick installers, not true installations, so include those in your review when you list installed apps.
Document your device details: Windows edition, OEM utilities, and any licensed programs. Make a side-by-side list of programs you rely on versus candidates for removal.
Finally, note license keys and per-user items, and agree expectations with other users. Plan simple validation steps — boot time checks and background process counts — so you can measure the impact of each change.
Quick removal from the Start menu and Settings
You can tidy the Start experience fast by unpinning or uninstalling items from your profile. Start with visible tiles and icons, then verify the full list in Settings to catch traditional installs.
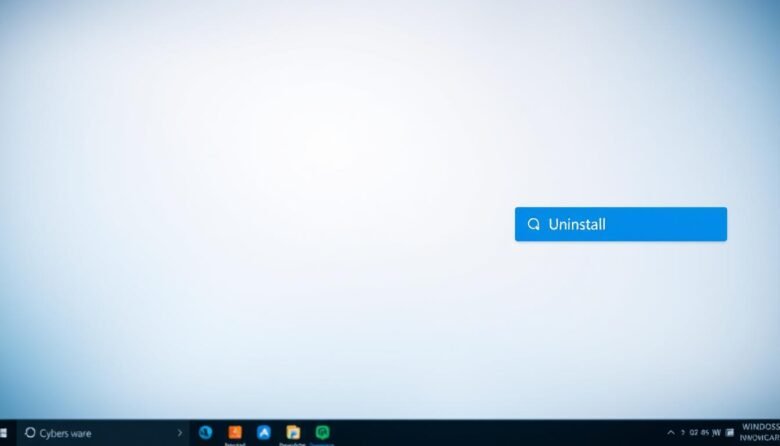
Uninstall via Start menu for the current user
Right-click any tile or icon in the Start menu and choose Uninstall to remove that app for the current profile only. This action does not affect other users on the same machine.
Use Settings > Apps > Installed apps to remove programs
Open Settings, go to Apps, then Installed apps to run the traditional uninstaller. Select the entry and click the Uninstall button, then follow prompts to finish removal.
Ghost apps and quick installers pinned to the Start menu
Some tiles are “quick installers” that show an installer progress bar when clicked. Those ghost entries are not listed under installed apps until you complete installation. To avoid installing more, unpin the tile instead of launching it.
Tip: After cleanup, scan the menu categories and All apps to confirm results. Keep a short log of items you removed so you can repeat the steps for other profiles or devices.
Remove bloatware Windows with Group Policy and Start menu cleanup
Use a small policy change and a quick profile reset to stop cloud‑pinned recommendations from cluttering the Start layout.
Turn off cloud‑optimized content: Open Edit Group Policy and go to Computer Configuration > Administrative Templates > Windows Components > Cloud Content. Enable Turn off cloud optimized content to block promotional tiles and news that auto‑pin to the start menu.
Clear the Start cache for the current profile
Open File Explorer and show hidden items. Navigate to C:\Users\\AppData\Local\Packages\Microsoft.Windows.StartMenuExperienceHost_cw5n1h2txyewy and delete the LocalState folder. This resets the Start layout for that user.
Scope and caveats
This change targets pinned links, not installed apps, so the removal affects the current profile and any new users. Other existing users keep their menus unless you repeat the process for them.
Note: a future feature update may re‑introduce promoted tiles. Document the setting and monitor the update process so you can reapply the policy if news or pinned items return.
PowerShell methods for removing Windows apps safely
A scripted PowerShell workflow helps you target nonessential packages while keeping key utilities intact.
Start with an allowlist. Enumerate installed windows apps and programs, then filter out essentials like Notepad, Calculator, Store, and Terminal so core software and dependencies stay safe.
Decide if you will target the current user or apply changes system‑wide. Use Remove-AppxPackage for a single profile or Remove-AppxProvisionedPackage with -AllUsers for a machine‑level cleanup.
Combine package removal with automated policy changes to turn off Start web search, Windows Feeds, and consumer features. Import modules such as PolicyFileEditor, write the policy, run gpupdate, then restart Explorer to apply UI changes.
Keep scripts modular and log every action. Capture removed package names, versions, and timestamps so you can audit data and restore items if users request them later.
Test on a non‑production system and schedule periodic runs if feature updates reintroduce promoted apps. This approach makes removing bloatware safer at scale.
Using trusted tools like Win11Debloat to streamline the process
Win11Debloat speeds up cleanup by bundling common tweaks and selective app removal into one script. It targets preinstalled apps and consumer features so you can reclaim space and reduce background services fast.
What it can disable or remove
Win11Debloat can disable telemetry and ad features, remove Copilot and Cortana, strip widgets and pinned apps, and turn off Bing search integrations and Windows Recall. Many changes affect taskbar and Start elements for a quieter experience.
Run defaults vs. custom selections and rollback
Use -RunDefaults or -RunDefaultsLite to apply recommended tweaks quickly. Choose a custom run to keep specific apps or programs you need.
Most removed items can be reinstalled from the Microsoft Store. Keep notes of choices so you can revert settings or reinstall an app for a particular user.
Admin options and safety
The script supports Audit mode, applying changes to other users, and unattended command‑line runs for rollouts. This makes it easy to include in an image or setup script for multiple machines.
Plan a rollback path, test on a non‑production device first, and document what you toggled to make sure features remain available when required.
Persistence tips: keeping Windows from restoring bloatware
Keep your cleanup lasting by planning for updates that often restore default apps and settings. Expect feature and cumulative updates to re‑pin consumer apps or reset layout choices.
Schedule automated recovery: Create a scheduled task to run cleanup scripts at user logon. The first run may take more time as it clears leftover pins and resets layouts. Subsequent runs finish quickly and restore your defaults with minimal delay.
Build a clean base image: For fleets and shared devices, bake desired defaults into a master image so new users inherit a tidy profile. This reduces manual work and keeps the setup consistent across devices.
Version and document scripts: Keep versioned copies of your scripts and related files. Test them after major updates and keep simple logic so the process adds little overhead to each sign‑in.
Review and audit
Run a quick audit after each major update. Confirm Start pins, search behavior, and disabled consumer features remain as intended. A quarterly review helps catch drift and keeps users productive.
Post-removal checks: performance, storage, and user experience
Wrap up cleanup with a few simple tests to confirm apps, pins, and performance metrics behave as expected.
Verify app list, Start menu, and taskbar recommendations
Compare your installed apps list to the pre-cleanup inventory. Make sure unwanted windows apps are absent and essential items remain.
Check the Start menu and taskbar icon areas. Confirm recommendations and consumer pins are disabled and ghost entries no longer appear.
Measure improvements: boot time, disk space, background processes
Record boot time before and after to quantify gains. Note background process counts to show fewer auto-started programs and services.
Review free space on the system drive to estimate reclaimed storage space. List the biggest contributors so you know where most space came from.
Collect user information about fewer pop-ups and faster launches. Use a small benchmark—an example is timing File Explorer or a browser start—to gauge responsiveness.
If an expected program is missing, reinstall from the Store or your software repository, then re-test. For odd results, re-run scripts or policies and sign out/in to flush caches.
Tip: Document findings and steps so colleagues can replicate the process on similar machines and keep setups consistent.
Your safer, cleaner Windows setup moving forward
Make a repeatable plan that preserves needed software while trimming excess on each device.
Inventory installed apps and programs, document names and versions, and save a simple rollback file. Use Group Policy and a trusted tool such as Win11Debloat or your own scripts to automate cleanup and reapply settings after updates.
Schedule routine runs so the system keeps its baseline. For fleets, store scripts in a central repo with notes for admins and a clear button users can press to request reinstalls.
Balance performance and usability by whitelisting gaming utilities and essential apps. Over time this approach frees storage space, cuts support tickets, and keeps your windows experience fast and focused.