Quick fixes often clear common display glitches. This short guide shows a friendly, stepwise approach to restore a normal viewing experience on your Windows device.
Start with the simple checks: use the built-in slider, confirm power plan settings, and try a restart. These first steps catch many temporary faults and save time.
If the issue persists, we move into display settings, driver updates, and system-level tools. You’ll learn how power modes and adaptive controls can change what you see, and how to spot when hardware may be at fault.
Follow each step and test as you go. That helps you confirm progress and avoid needless actions. This clear path keeps troubleshooting focused and safe for users in the United States.
Key Takeaways
- Begin with the slider, power plan, and a simple restart.
- Check display settings before chasing drivers or hardware.
- Power modes can lower display output automatically.
- Test after each change to confirm improvement.
- If issues persist, seek reputable support and avoid scams.
Understand the issue and your options right now
Take a moment to observe how the display behaves before changing settings. Note whether the brightness slider moves and whether the panel actually changes when you adjust it.
Present-time checks: is it a settings, software, or hardware problem?
If the slider changes but the view does not, suspect a driver or hardware case. If the level shifts with room light or when unplugged, adaptive features, power plans, or battery saver likely control the display.
Check multiple user profiles. Profile-only symptoms point to settings or software. Device-wide issues suggest drivers or a failing panel.
When to try quick fixes versus deeper system changes
Try quick options first: toggle battery saver, switch power mode, and adjust display settings. These are safe and often fix most cases.
If quick checks fail, move to driver updates, rollbacks, or testing with an external monitor before reinstalling the operating system. Document each option you change so you can revert if needed.
Quick decision tip:if adjustments stick, it was a settings case; if they don’t, suspect system-level software or hardware and escalate accordingly.
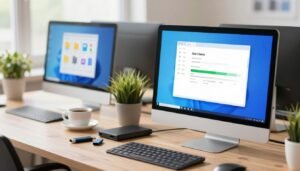
Screen brightness problems: fast checks in Windows Settings
A handful of Settings toggles will often restore a steady view without technical steps. Use these quick tests in Windows to tell if controls or power rules are affecting the display.
Use the brightness slider in Quick Settings and Display settings
Open Quick Settings (Win + A) and move the brightness slider. If the screen does not change or the slider is missing, open System > Display and confirm you’re adjusting the active display device.
Turn off Adaptive Brightness if the view fluctuates
If the panel dims with content or room light, disable Adaptive Brightness or Content Adaptive Brightness Control in Display settings. This stops automatic dimming that can conflict with manual control.
Check Battery saver, Power mode and restart
Open Settings > System > Power. Switch from battery saver or a low power profile to Balanced or Best performance to test the level. If changes only occur on AC power, compare On battery and Plugged in options.
Restart your device after changes. A reboot clears temporary faults and often restores normal operation without further steps.
Fix display drivers and system updates for lasting results
Begin driver and update checks to ensure display controls respond correctly. Start in Device Manager and expand the Display adapters node to see your GPU entry.
Update or roll back drivers in Device Manager
Right-click the adapter and choose Update driver to let Windows search or use a downloaded package from the vendor. If the issue began after a recent update, use Roll Back Driver to test whether the previous version restores normal control.
Use Windows Update for system-level fixes
Run Windows Update to install graphics and OS updates that include driver patches. After updates, restart the operating system so drivers and display services initialize cleanly.
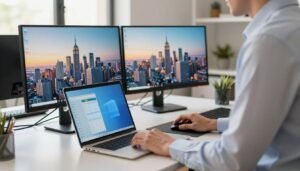
Reinstall drivers and test with an external monitor
If symptoms continue, perform a clean install: remove the current driver, then install the latest vendor-recommended package. This removes corruption that can block display adjustments.
Compare the laptop panel to an external monitor. If the monitor behaves normally but the built-in panel does not, the fault likely lies with panel hardware or cabling. If both ignore changes, prioritize driver reinstall and broader system maintenance.
Account for sensors, accessories, and environment
Inspect accessories and the bezel area to make sure sensors can read ambient conditions correctly.
Locate the light sensor near the webcam or bezel and confirm nothing covers it. Camera shutters, stickers, or a tight case can block the sensor and force the display to lower its level.
Quick tests and adjustments
Test the device in bright daylight and in a dim room to see if adaptive brightness reacts too aggressively. Temporarily disable adaptive brightness to check whether manual control holds steady.
Clean the sensor area gently and remove privacy filters or matte covers while testing. For an external monitor, adjust the monitor’s own controls and turn off any eco or dynamic contrast feature that may dim the display.
When you search for device-specific information, consult your laptop manual to confirm sensor placement and supported features. If cleaning and feature changes don’t help, document what you tried and move on to driver and system checks.
Next steps and safe support if problems persist
When fixes don’t stick, collect details so assistance can act fast.
Note the exact behavior, the options you changed, and when any updates occurred. Test with an external monitor and record whether the display or the monitor reacts. This helps support narrow the case to driver, hardware, or system pathways.
Install available updates, including software updates and driver packages, then restart the operating system before you contact official channels. Use manufacturer support first and avoid contact info found in random search results.
If hardware is likely, ask about warranty service. For IT teams, keep a standard OS and driver baseline to restore a reliable experience quickly.
FAQ
What should I check first when my screen isn’t adjusting correctly on Windows?
How can I tell if the issue is software or hardware?
Why does auto-dimming keep changing my screen level during the day?
What quick fix works most often for temporary glitches?
How do I update or roll back display drivers in Windows?
Should I run Windows Update for this issue?
When is a clean driver install necessary?
How can I isolate whether the laptop panel or GPU is failing?
Could accessories or environment affect display behavior?
What if I’ve tried fixes and the problem keeps coming back?
Are there any quick maintenance steps to prevent future recurrence?
Ava Kensington is a tech writer who believes technology should make life easier, not more complicated. She created MoodTechs to help everyday users get the most out of their devices with clear, step-by-step guides — no jargon, no fluff. From fixing a stubborn printer to locking down your privacy settings, Ava breaks it down so anyone can follow along.